Elite PI
This section contains support articles regarding the Elite PI® product line.
These products include the Elite PI® Mini, Elite PI® Standard, the Elite PI® PRO, and the ENET networking router.
ELBNK MOXA Serial Router
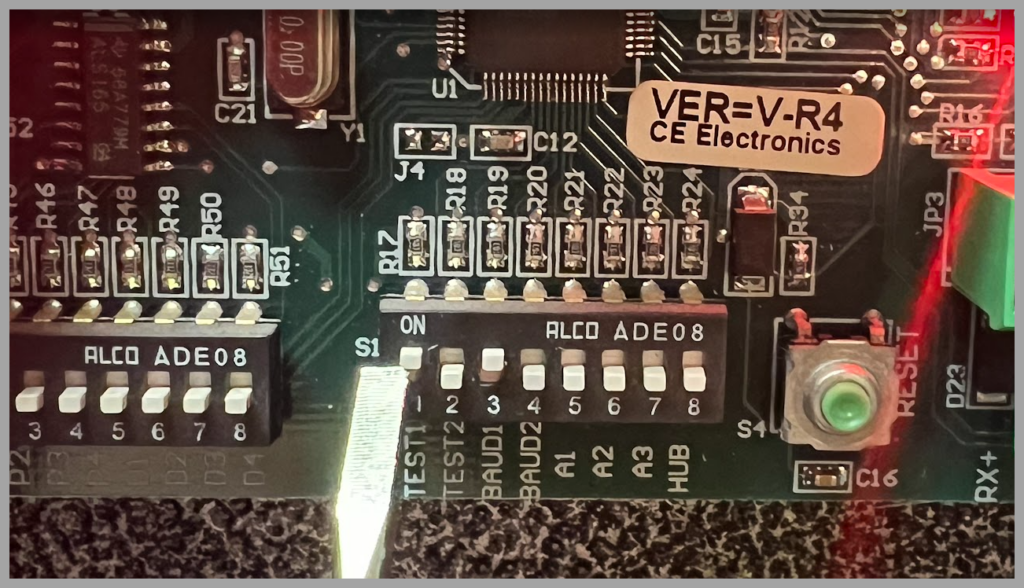
If you are using the discontinued ELBNK serial networking unit, you may need to test to see if the unit is properly connected to the Elite PI screens. First you will need to locate the ELBNK board. For this example, I will demonstrate the procedure using the C.E. Electronics duplex 2-channel ELBNK. The other product is an 8-channel ELBNK, but the process is still the same. This process also assumes that you have wired the ELBNK to the Elite PI. You can reference this wiring diagram when making those connections.

STEP 1.
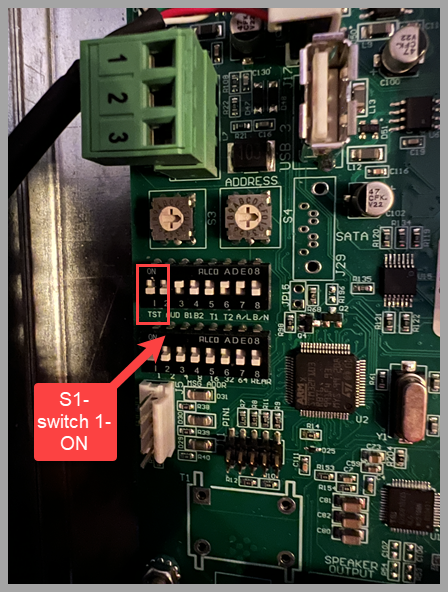
To test the output channel links, set S1, DIP switch 1 to ON.
STEP 2.
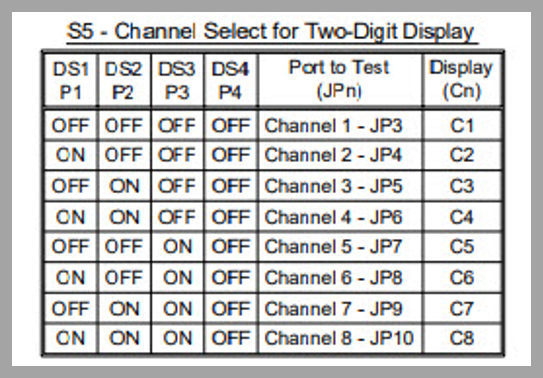
Use the table below to set the S5 DIP switches for the channel to test.
a. If the two-digit display shows Cn (where ‘n’ is the channel) and then flashes between D1 and OK, then the connection is made properly.
b. If the two-digit display shows Cn (where ‘n’ is the channel) and then flashes between D1 and —, go to Step 3.
c. If the two-digit display shows Cn (where ‘n’ is the channel) and then flashes between D1 and a number, contact C. E. Electronics Tech Support at 419-636-6705
STEP 3.
Unplug the connector from the output channel jack (JPn) and swap RX+ with TX+, swap RX- with TX-, and then plug the connector back into JPn.
a. If the two-digit display shows Cn (where ‘n’ is the channel) and then flashes between D1 and OK, then the connection is made properly.
b. If the two-digit display still shows Cn (where ‘n’ is the channel) and then flashes between D1 and —, contact C. E. Electronics Tech Support at 419-636-6705
c. If the two-digit display still shows Cn (where ‘n’ is the channel)and then flashes between D1 and a number, contact C. E. Electronics Tech Support at 419-636-6705
Elite PI® Pro
In the event that you require a design that is being displayed on your Elite PI PRO screen but you no longer have access to the original file on your PC you can follow these steps to recover the design directly from the Elite PI PRO screen.
STEP 1:
Download the file located at the bottom of this article.
STEP 2:
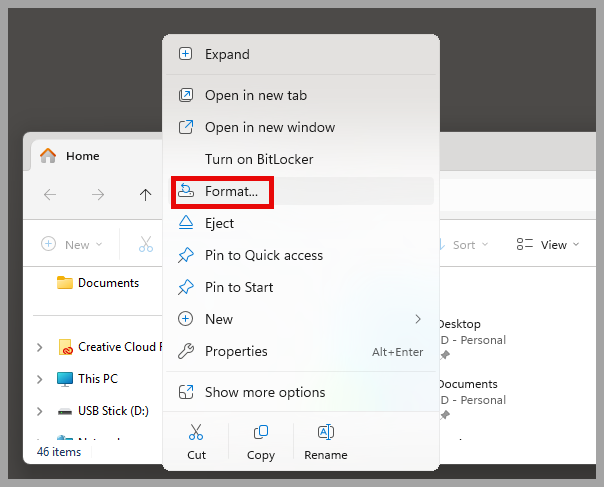
You will need a USB stick to save the file to. We recommend that you use a USB stick that is no larger than 64Gb. Insert the USB stick into your PC and format it by right-clicking on the USB drive and selecting “Format”.
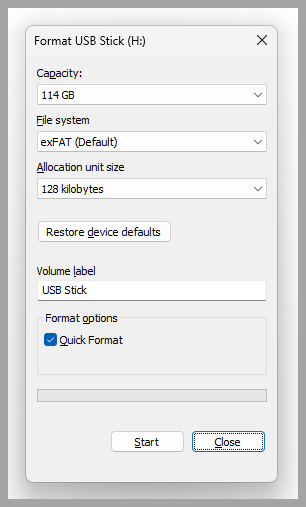
We recommend the following settings for the formatted USB stick.
STEP 3:
Drag and drop the file into the freshly formatted USB drive.

STEP 4:
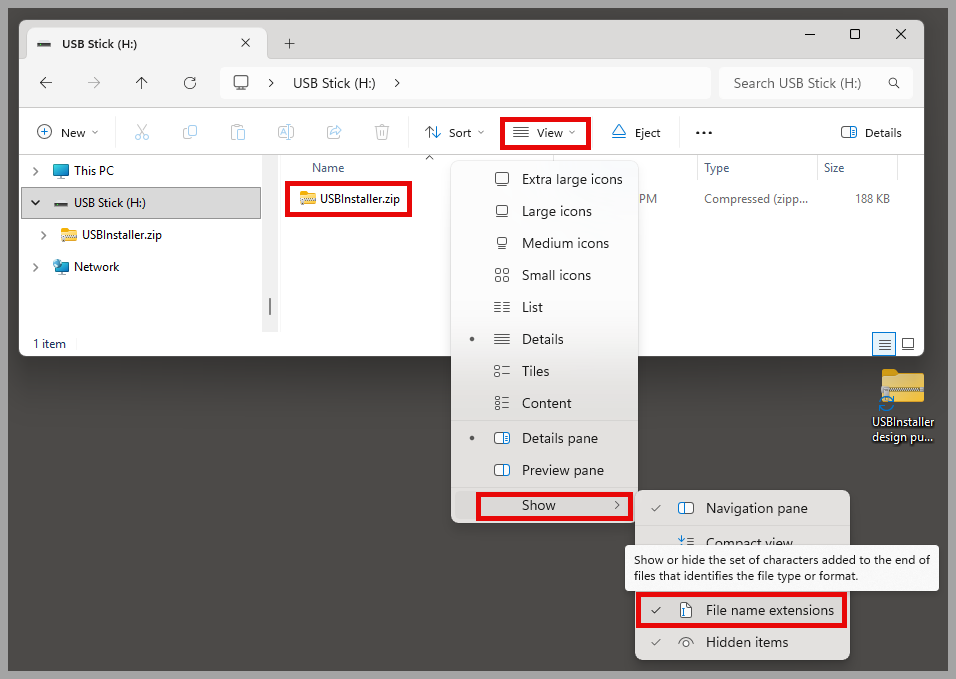
THIS IS VERY IMPORTANT — The file MUST be renamed “USBInstaller”. If the file is not renamed “USBInstaller” then the Elite PI PRO will not do anything when you insert the USB stick into the back of the screen. It is also recommended that you turn on file extensions so you can confirm that the file is named properly. Do this by selecting “View” then “Show” and making sure that “File name extensions” is checked. Now you need to confirm that the file shows “USBInstaller.zip”. Again, make sure that you see “USBInstaller.zip” otherwise the following process will not work.
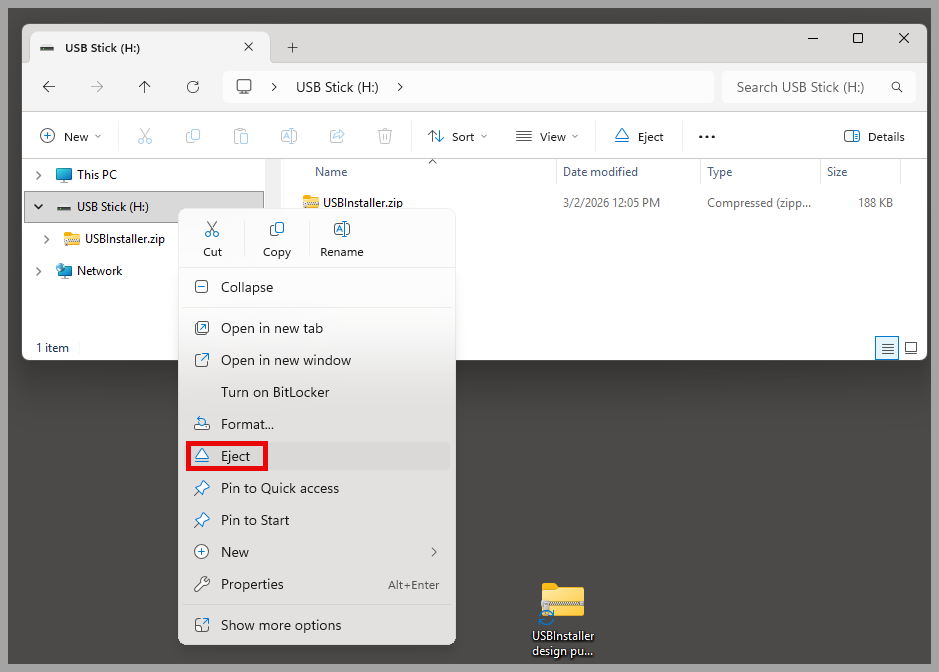
Now you can safely eject the USB stick by right-clicking on the USB drive and selecting “Eject”.
STEP 5:
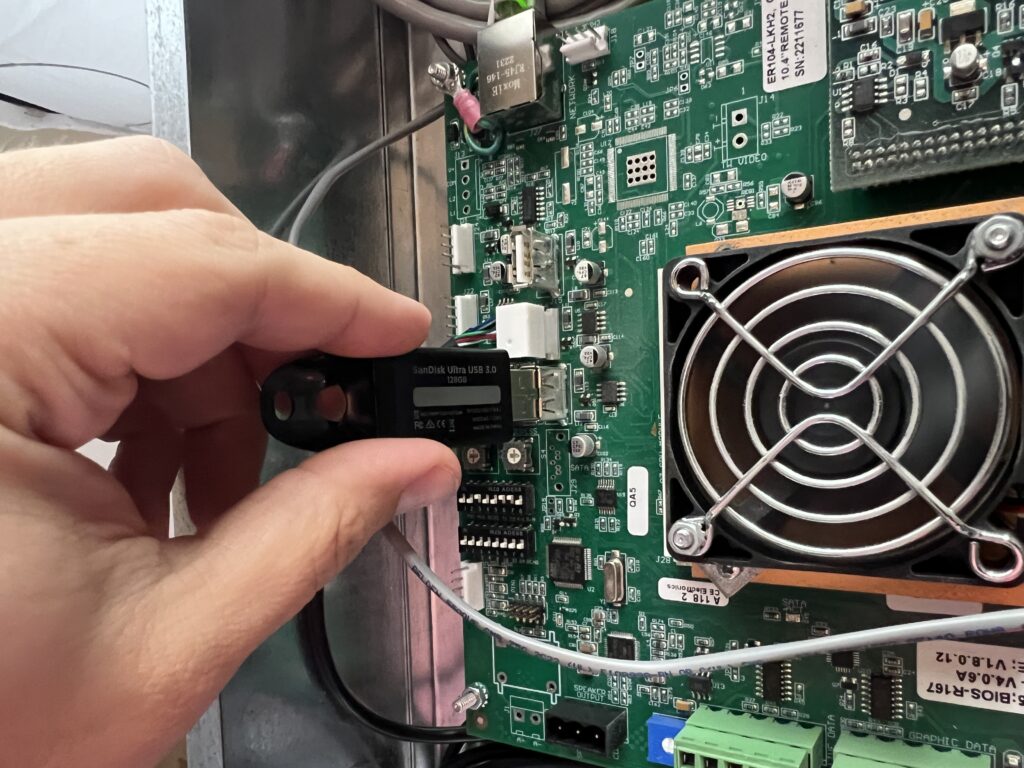
Insert the USB stick into the back of the Elite PI PRO screen. In some instances, the computing unit is not mounted directly to the back of the screen. This is typically done where space is a constraint and the unit could be mounted on top of the cab. Once you have located one of the 2 USB ports, insert the USB stick into either one.
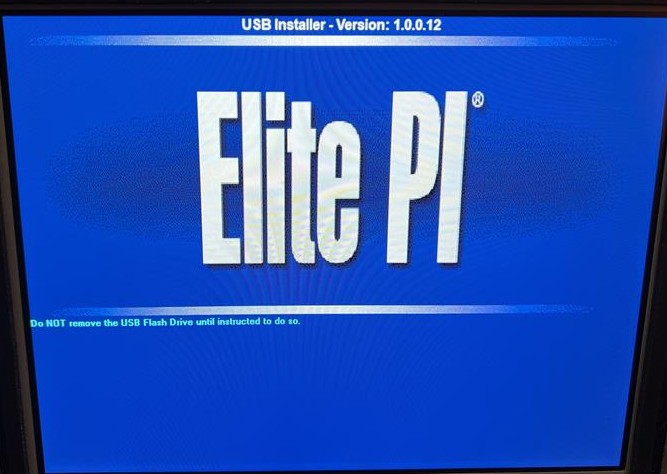
The Elite PI PRO screen will display a blue screen like this
Once the process is done, you will see this displayed on the screen.

If you see this error message, then it could mean a couple issues could be at fault.
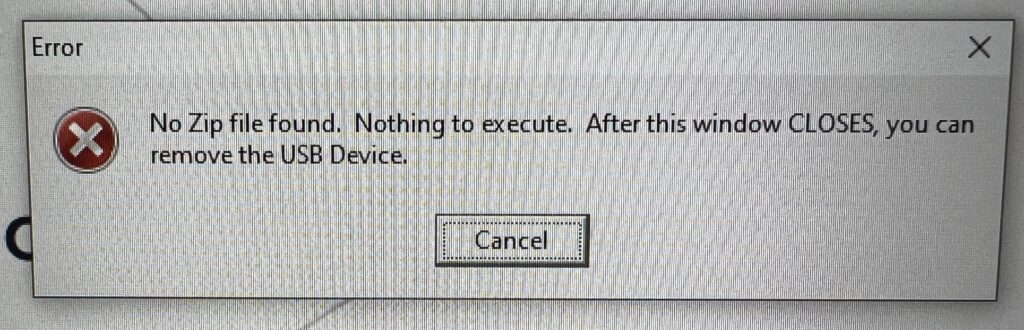
— Make sure that the file was named correctly as “USBInstaller.zip”.
–Cycle power to the Elite PI PRO screen. Make sure to count to 10 before re-applying power.
–The USB stick may be faulty. Try using a different USB stick making sure that the capacity is no more than 64Gb.
STEP 6:
Once the process has completed properly and the screen shows the message that you can now remove the USB Drive, you can unplug it from the Elite PI PRO screen and return to your PC. Insert the USB stick into your PC and click to open it. Inside the USB drive you will now see a new file labeled “VolumeOut-All”. Open that file and you will see another file labeled either “CURRENT1” or “CURRENT2”. Open that file and you will see your design file as a .zip folder. Drag and drop the .zip folder to your desktop, or in any file, to save it to your PC.
STEP 7:
You can now drag and drop that file into the Elite PI Designer program to edit and make any changes to your design.
If you require any information on using the Elite PI Designer program, you can reference this tutorial.
If you want to send that design file directly to an Elite PI PRO screen using the Elite PI Transfer program, you can reference this tutorial.
Step 1.
On the back of the Elite PI PRO, you will see 2 banks of dip switches, S1 and S2. On dip switch back S1, you will want to flip dip switch 1, labeled “TST”, to on.
Step 2.
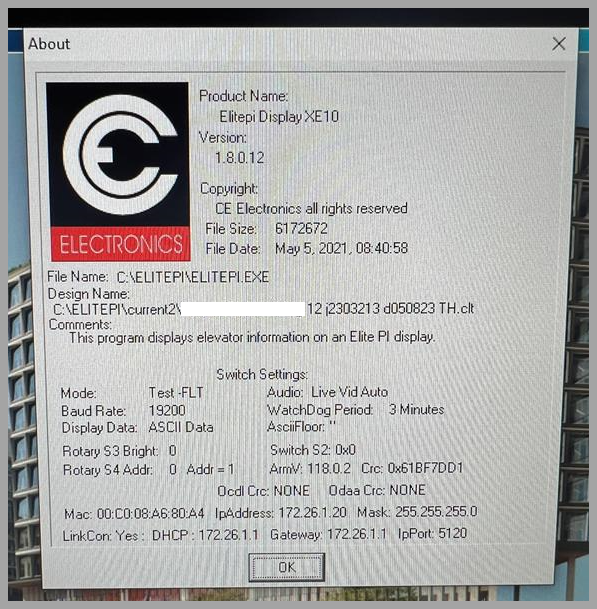
On the front of the screen, you will now see the diagnostic info screen. If a C.E. tech support specialist has requested a picture of this screen, please make sure that you get all of the information and that the image is not blurry.
ENET Networking Router
Process to set a static IP address in a Enet router using scripts.
- First you must have the four script files which presently are named resetCEDefaults.rsc, RB3011CeDefaults.rsc, Hex5CeDefaults.rsc and setstatic.rsc. Once you have these files you can connect to the Router using Winbox like normal and once connected you can press the Files button to then get the File List to show. You can then mark and drag over the files or Click the Upload button on the File List window and select the files that way.
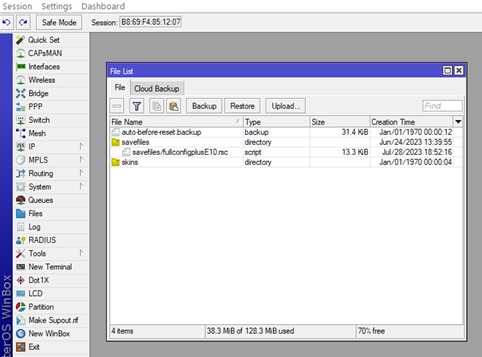
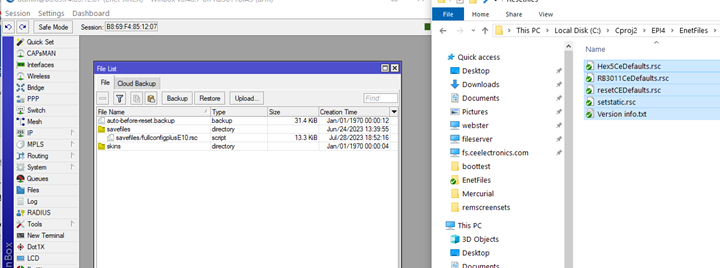
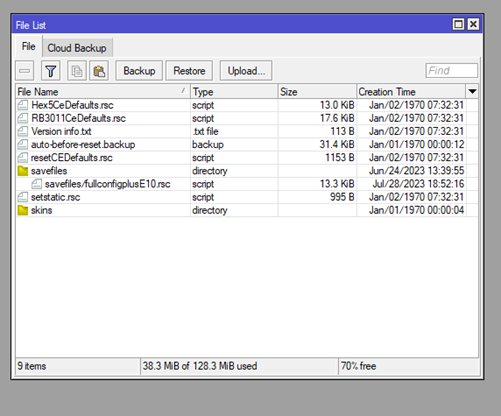
PLEASE note where the files need to be placed VARIES on the router. On the 10port unit the main area is find. As shown below.
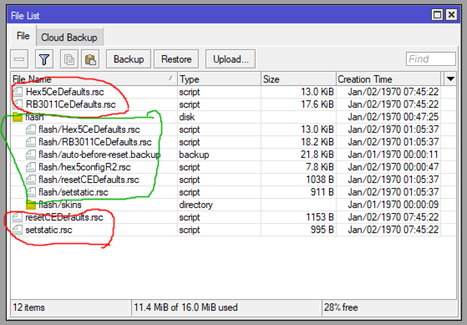
For the 5 port router you MUST put the files in the flash area. The files circled in RED area will not work but the ones in the GREEN area will work. This is needed because for the 5 port router ONLY files in the Flash area will be saved over a reboot. The files NOT in the flash area is the ram drive and will be lost on a power cycle or reboot.
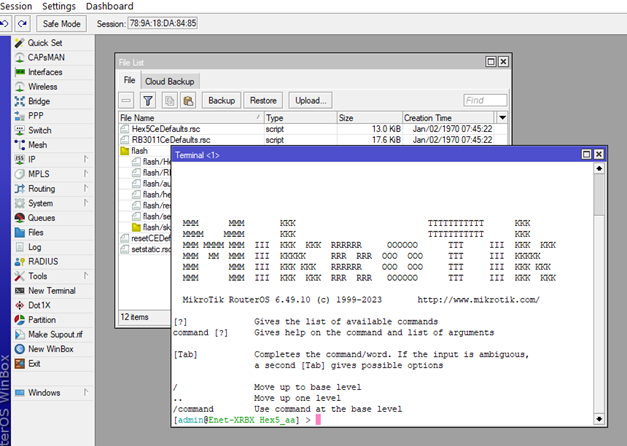
- Ok now that the files are on the unit you press the New Terminal button and get a terminal window showing.
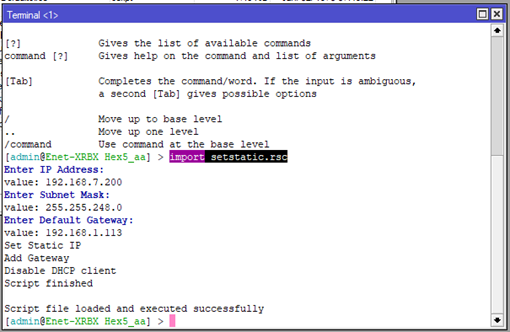
- To set the IP address click in the Terminal window and type “import setstatic.rsc”. Note auto completion works so you can just type imp then press tab then type set and press tab and then press enter to run the script. It will then show Enter IP Address: and value: now type in the IP address you want then press enter and then the Subnet Mask and then enter and then the type in the Gateway and the press enter. The script will perform the sets and the Router will now have a Static IP address on Eth1 – the customer network port.
- If for some reason the Router has been set incorrectly and you want to get back to CEDefaults then in the terminal window type “import resetCEDefaults.rsc” (auto completes work) and press enter. It will then run and detect the model of the router and if the files exist. If those tests pass then it will present a choice of do you really want to do the reset. At that point you press y. Note I can change the script so it does not ask the question but instead just does the reset. The unit will reset to as it was shipped originally with Eth1 being set for DHCP and allowing Winbox to connect. PLEASE note it can take up to 50 seconds for the reset to fully complete.

- WARNING for the 5 port routers the newer ones have a password with an Identity Hex5_aa and need a “admin” password to login. If you have an older Hex5 router and run this reset then this older router will now have the Hex5_aa and will require you to use a “admin” password to login.
You can download the required files here
Download
resetCEDefaults.rsc
Download
Hex5CeDefults.rsc
Download
RB3011CeDefaults.rsc
Download